How to Install GitAuto for GitHub
Ready to get started with GitAuto? Installing it is a breeze, and best of all, it's free! You won't be charged upon installation. If you're interested in a paid plan, you'll need to subscribe explicitly through GitAuto's website under the pricing section. The free plan is automatically applied upon installation. Plus, you can uninstall anytime and reinstall without any issues.
TL;DR: GitAuto Installation Steps
- Go to the GitAuto for GitHub installation page.
- Sign in to GitHub if you're not already signed in.
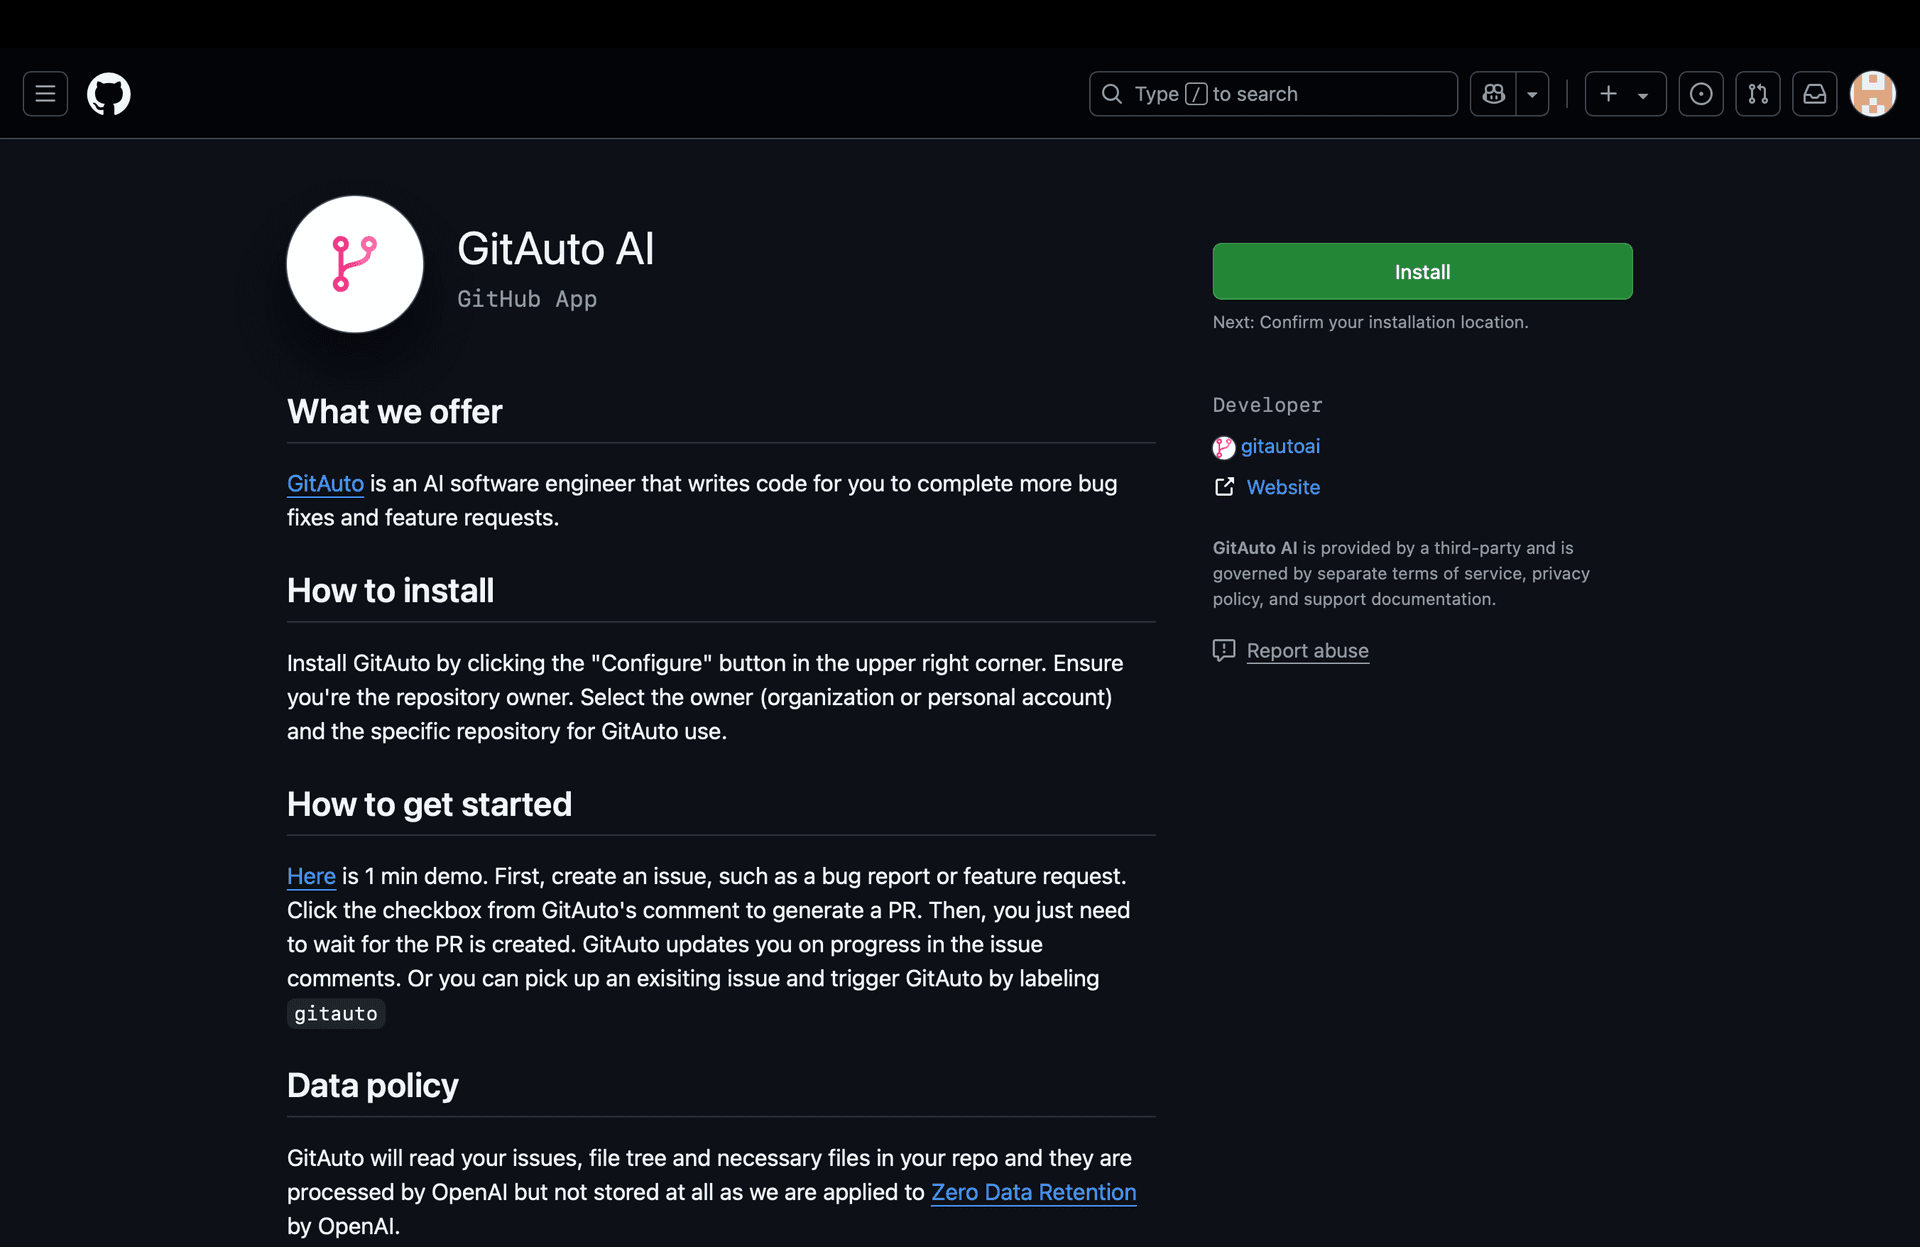
- Click the green "Install" button.
- Choose your GitHub account or organization.
- Choose your repositories for installation (all or specific ones).
- Post-installation: GitAuto will start interacting with issues and open a pull request for its issue templates.
- You can change the installation settings later here. So, don't worry about it.
Now, let's dive into the steps!
Step-by-Step Installation Guide
1. Go to the Installation Page
Head over to the GitAuto installation page. If you're not logged into GitHub, you'll need to sign in first. GitHub needs to know which organization or repository you want to install GitAuto on.
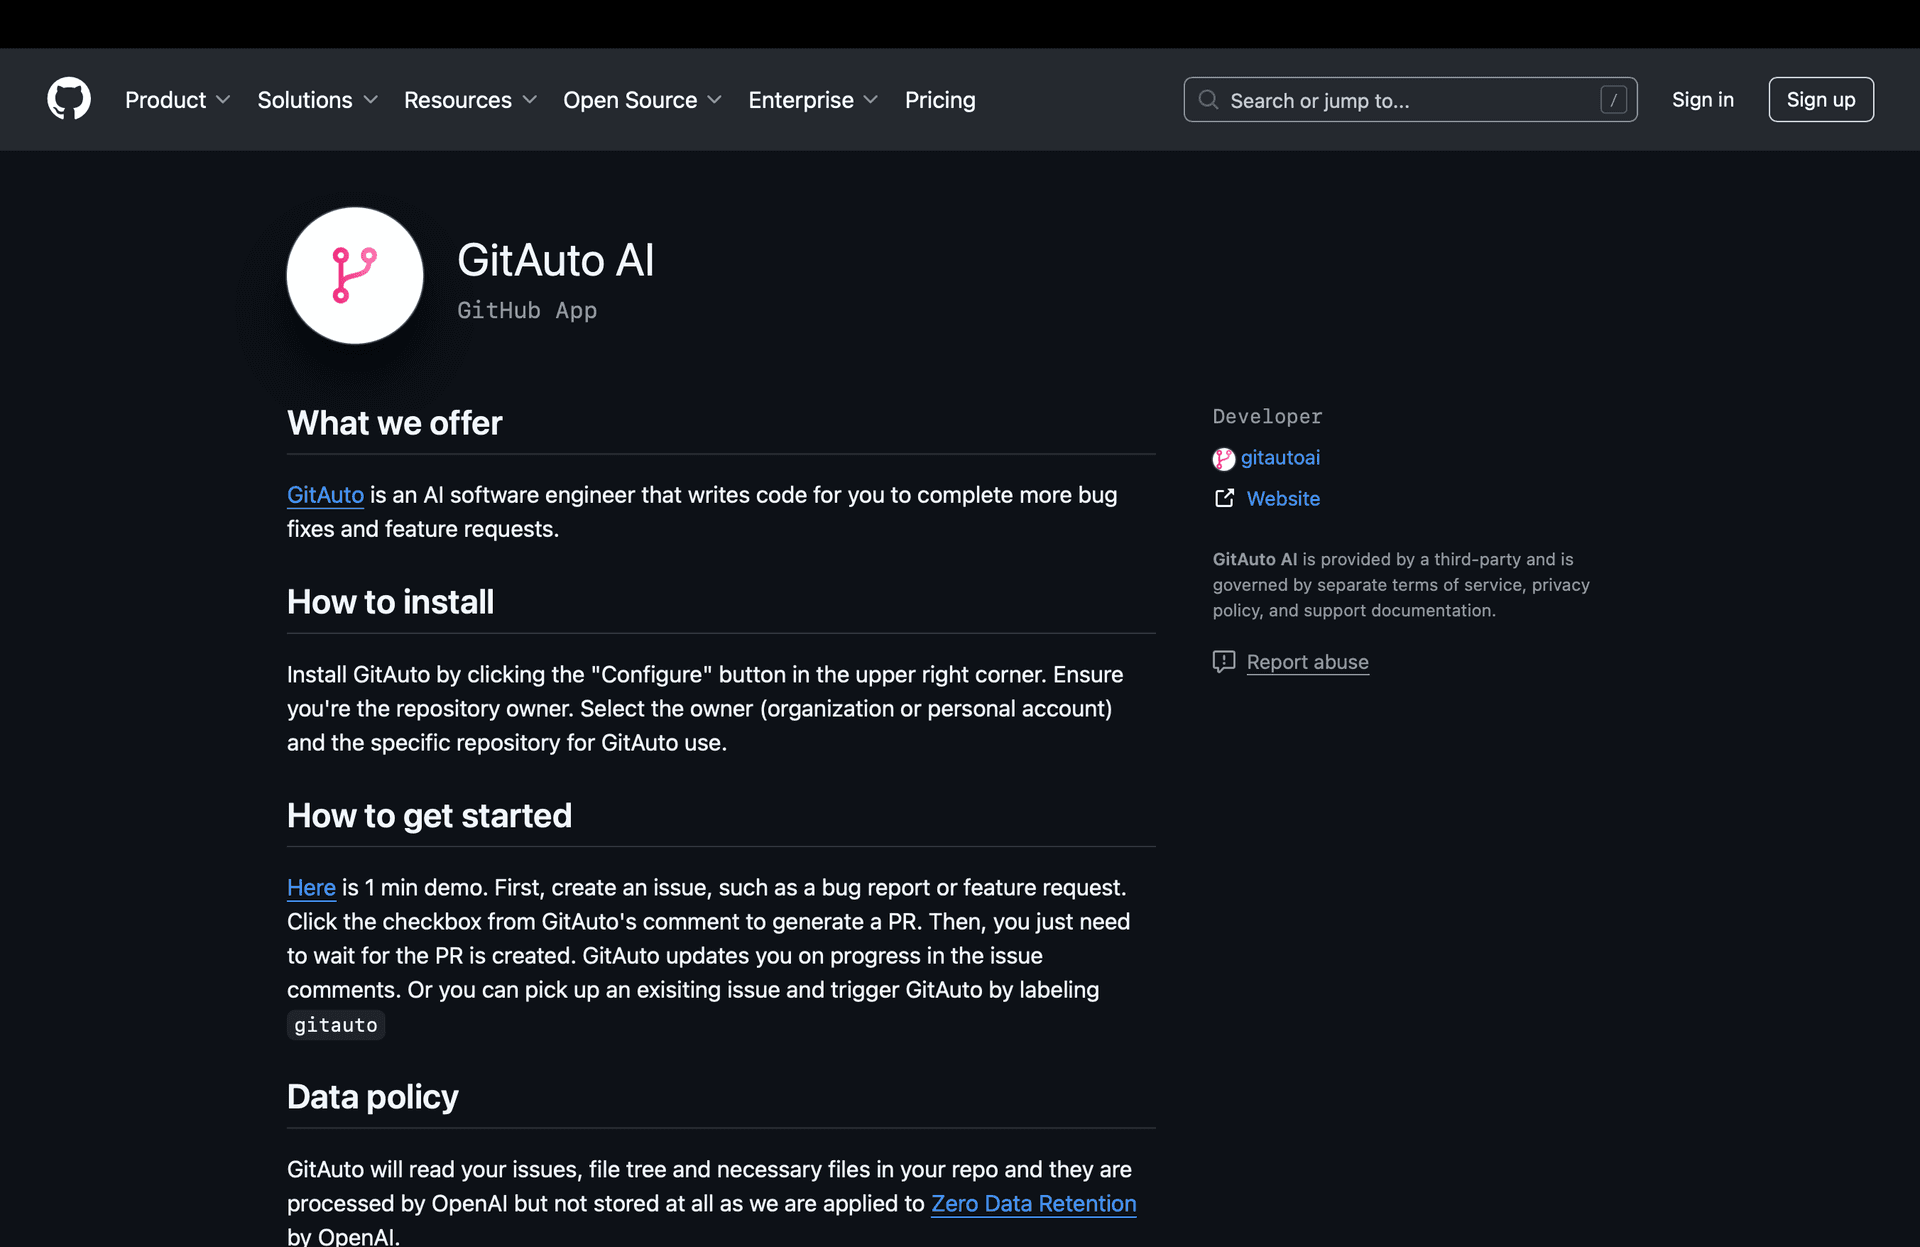
2. Sign In to GitHub
Once signed in, you'll see a green "Install" button at the top right. Click it!
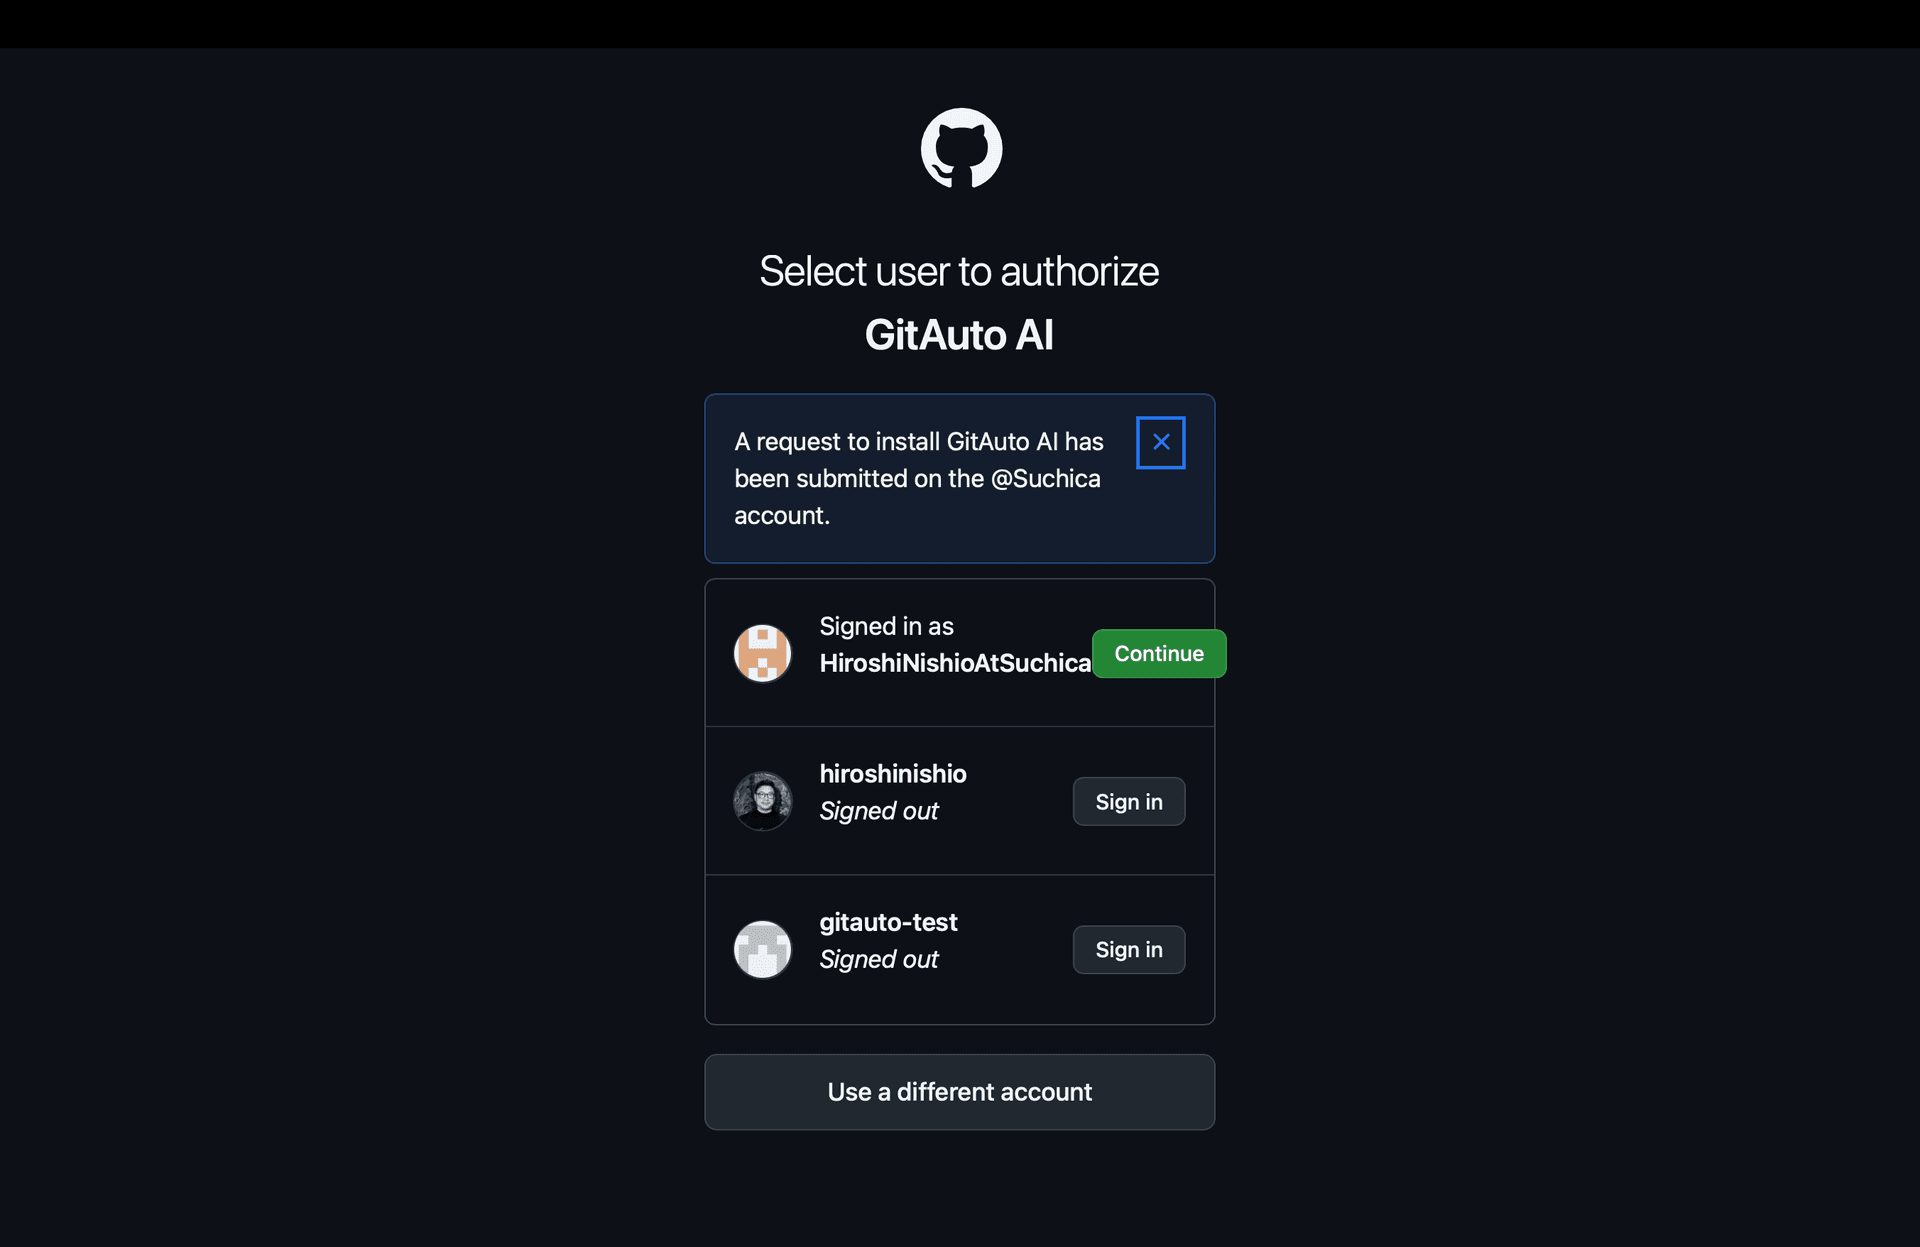
If you have multiple GitHub accounts, you might be asked which account to use for installation. Choose based on the organization where you want to install GitAuto.
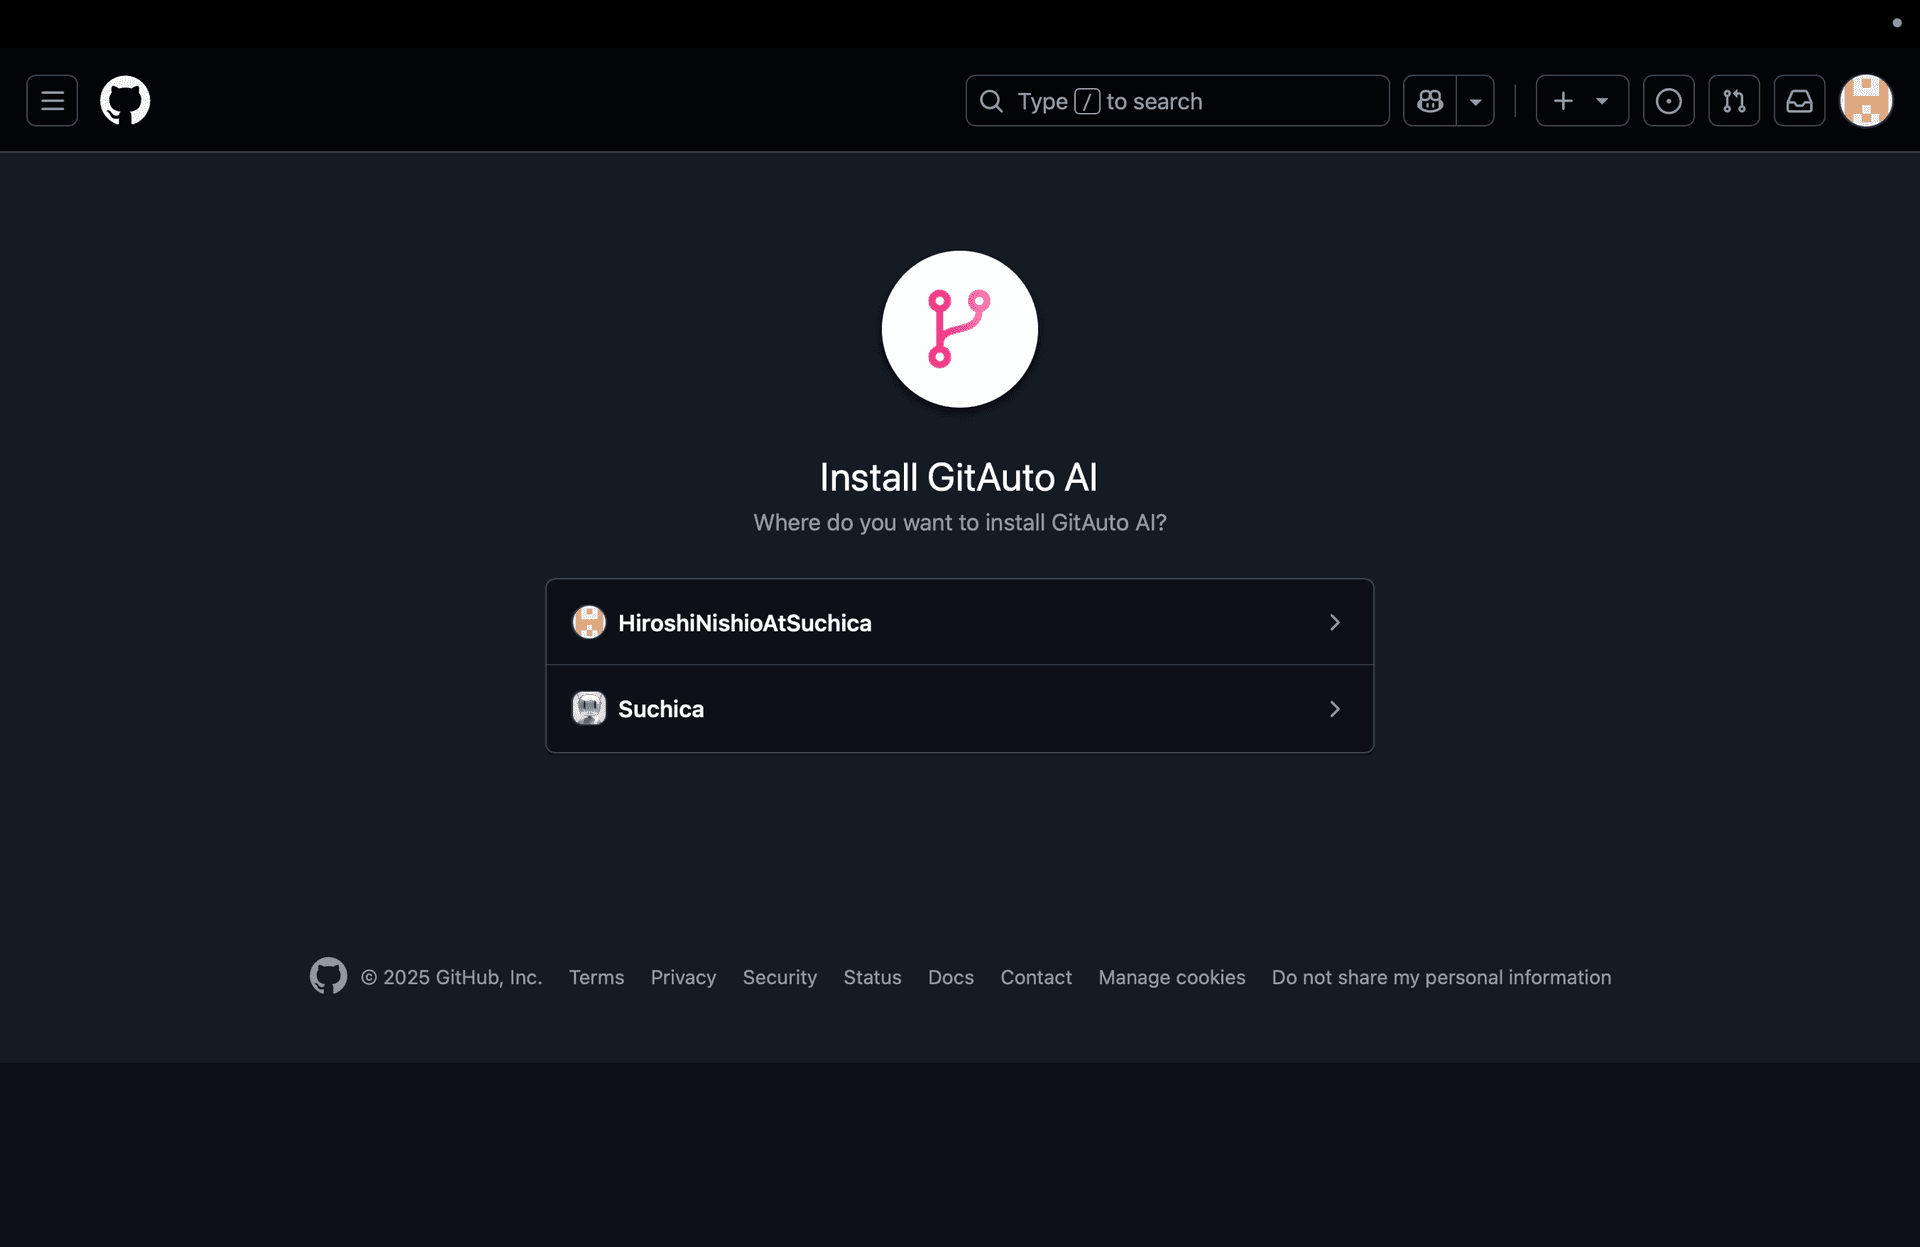
3. Select Your Workspace or Organization
You'll then see options for your personalized workspace or organizations associated with your account. If you're not part of any organization, you'll be prompted to install GitAuto in your personal workspace. Otherwise, select the desired organization.
4-1. Choose Repositories (for admins)
Decide whether you want to install GitAuto on all repositories within the organization or just specific ones. Don't worry, you can change this later. You can always return to this configuration screen by following the installation steps again, regardless of whether GitAuto is already installed or not.
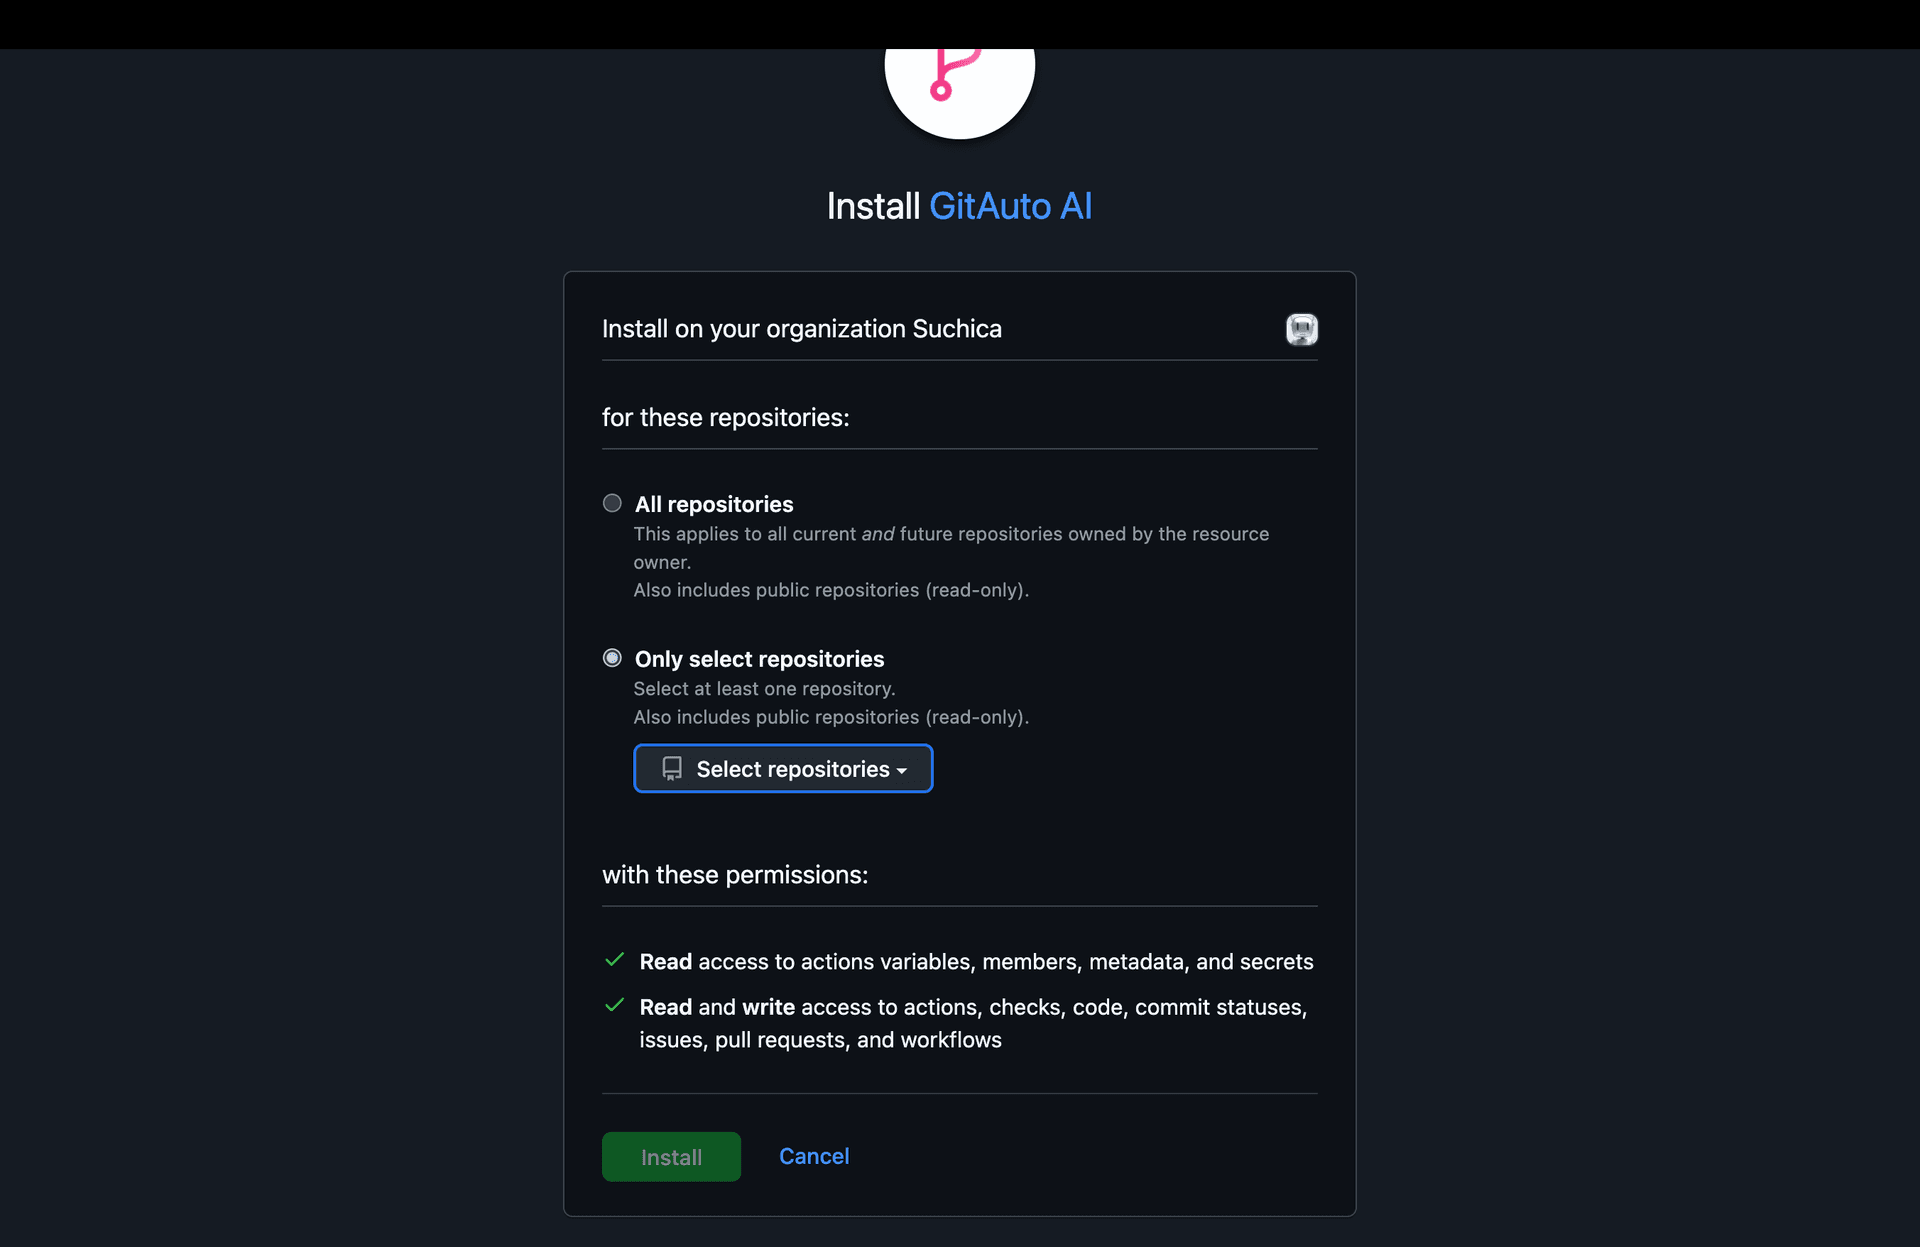
If you choose "All repositories":
- GitAuto will be automatically installed on any new repositories created in the future
- You don't need to manually configure GitAuto for new repositories
If you choose specific repositories:
- You'll need to explicitly install GitAuto on any new repositories you want to use it with
- This gives you more granular control over where GitAuto is active
No notifications will be sent to others about this installation, so if you want someone to know, you'll have to tell them directly.
4-2. Choose Repositories (for non-admins)
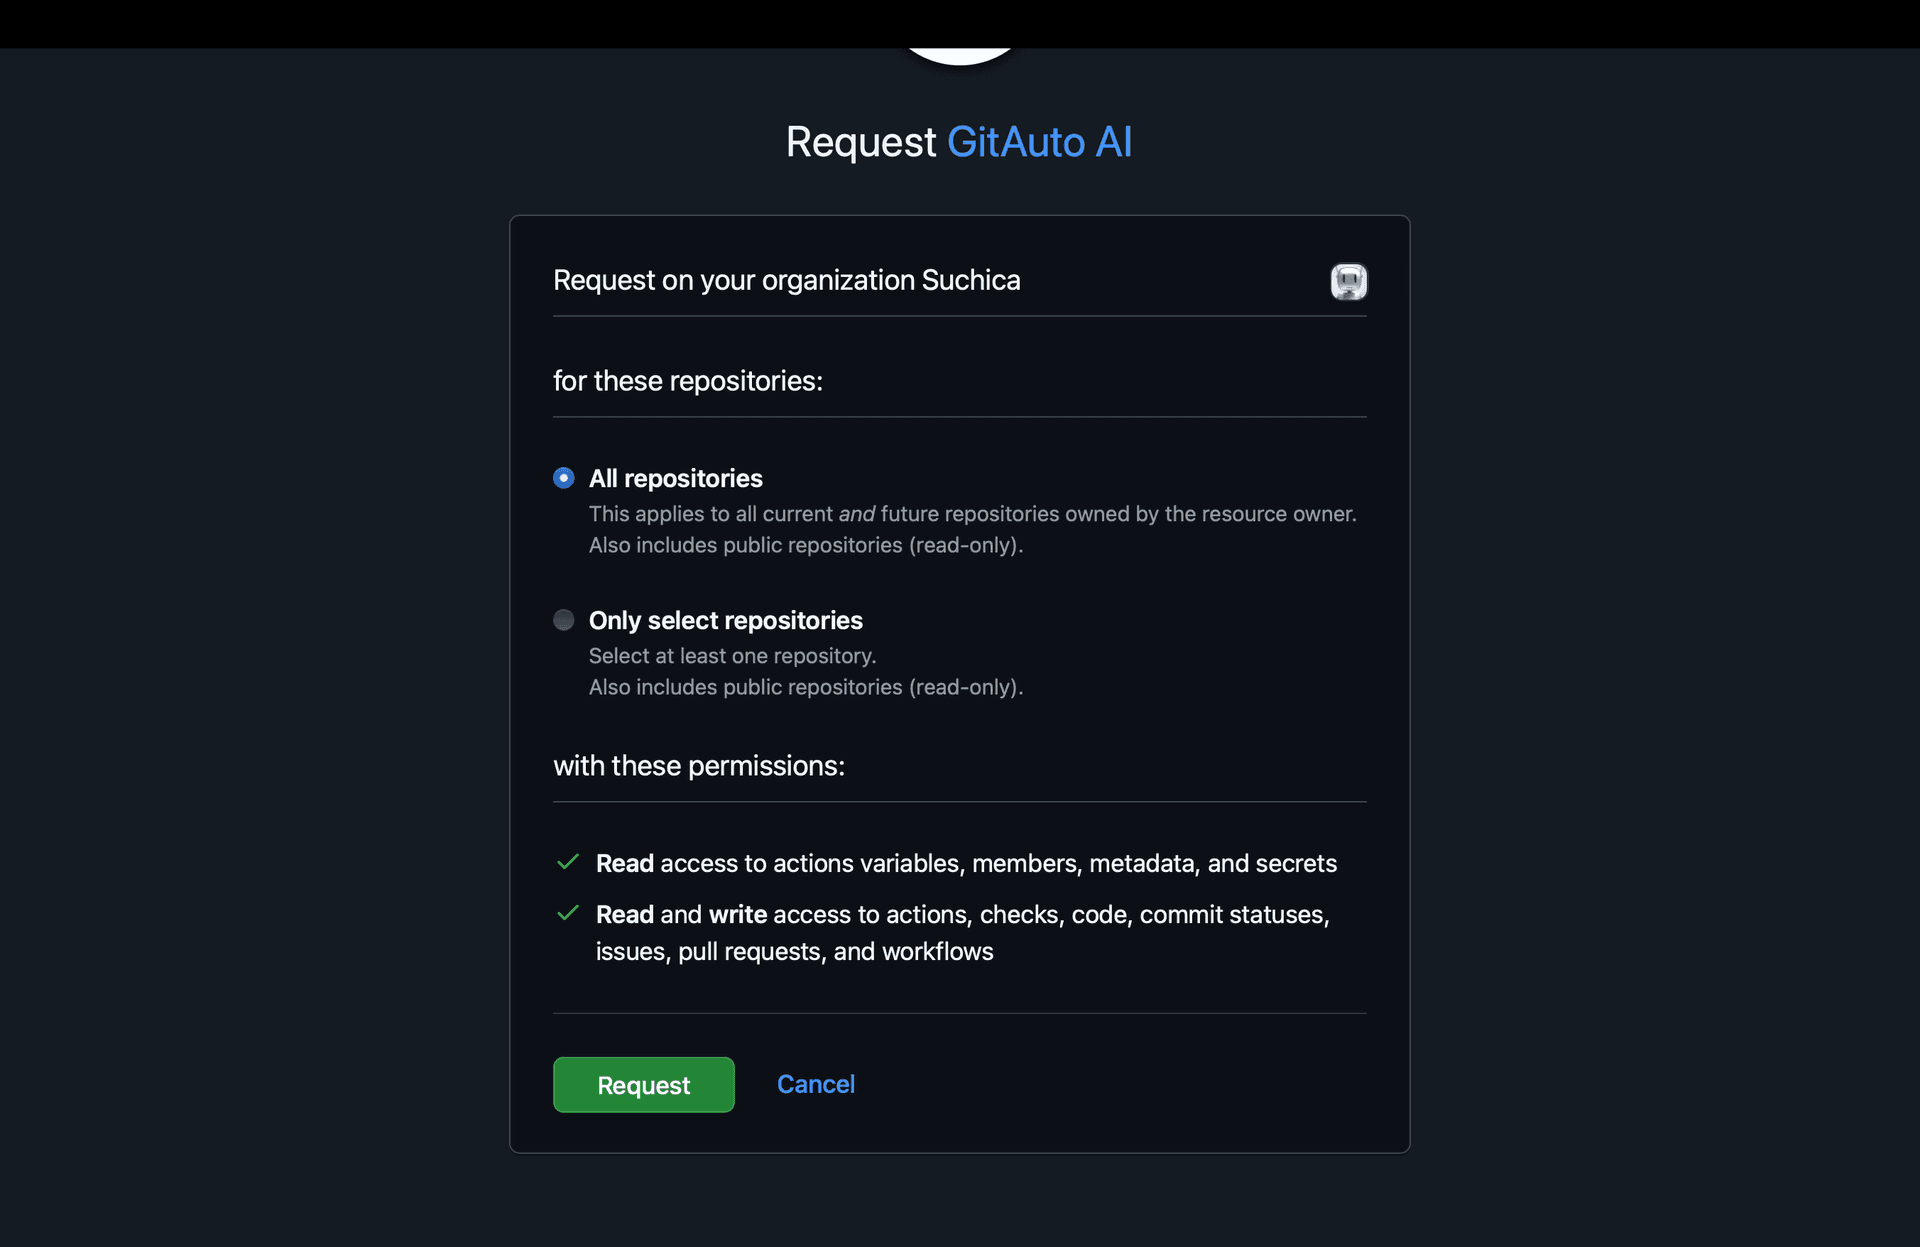
If you don't have admin permissions in the organization, you'll see a "Request" button instead of "Install". This happens when:
- You're not an organization owner
- You don't have admin privileges for the repositories
- The organization requires approval for third-party apps
In these cases, your installation request email will be sent to organization administrators for review.
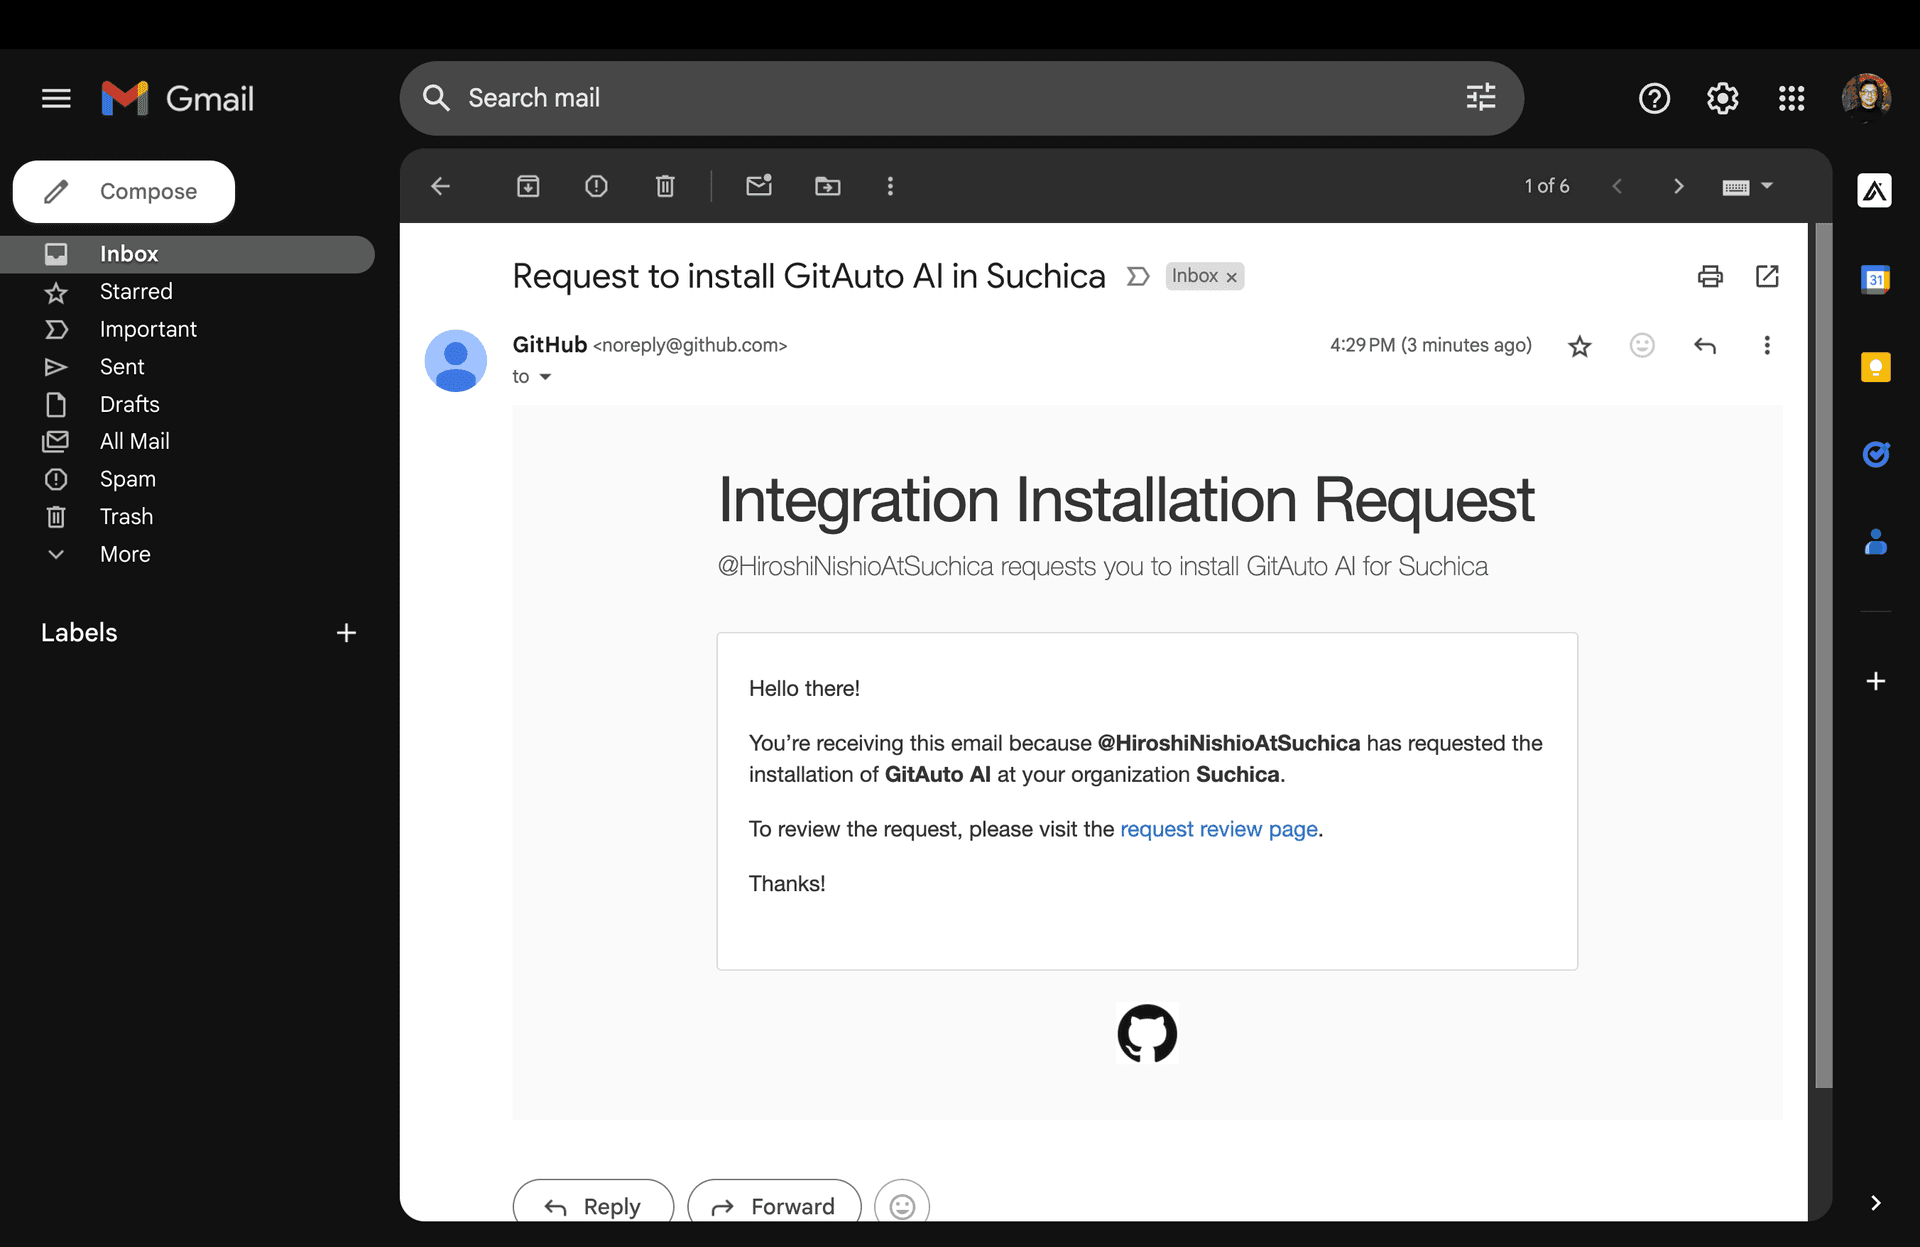
Organization administrators will receive an email notification and can approve or reject the installation request through the organization's settings page.
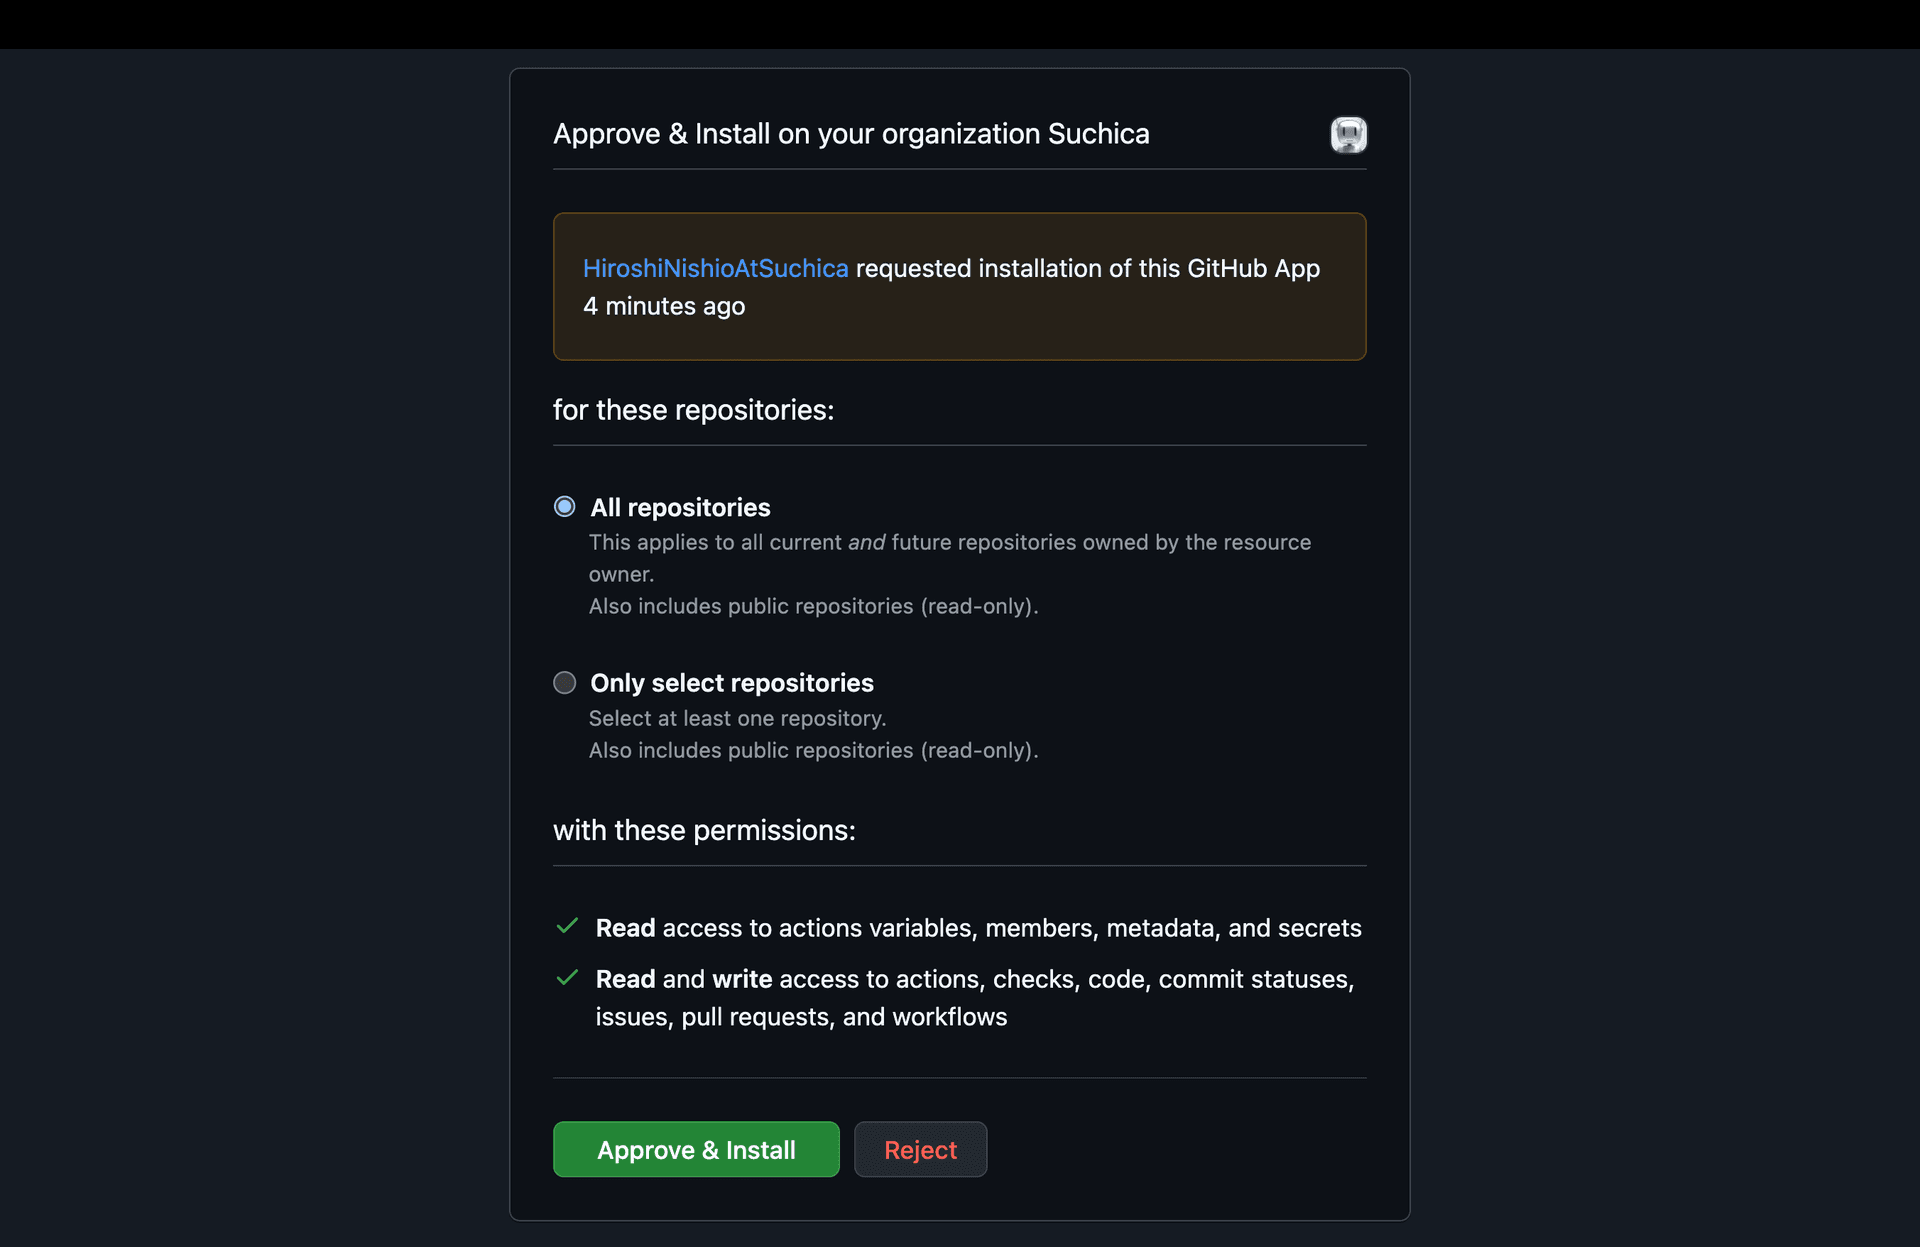
And when the admin visits the "request review page", they can see the installation request and approve or reject it.
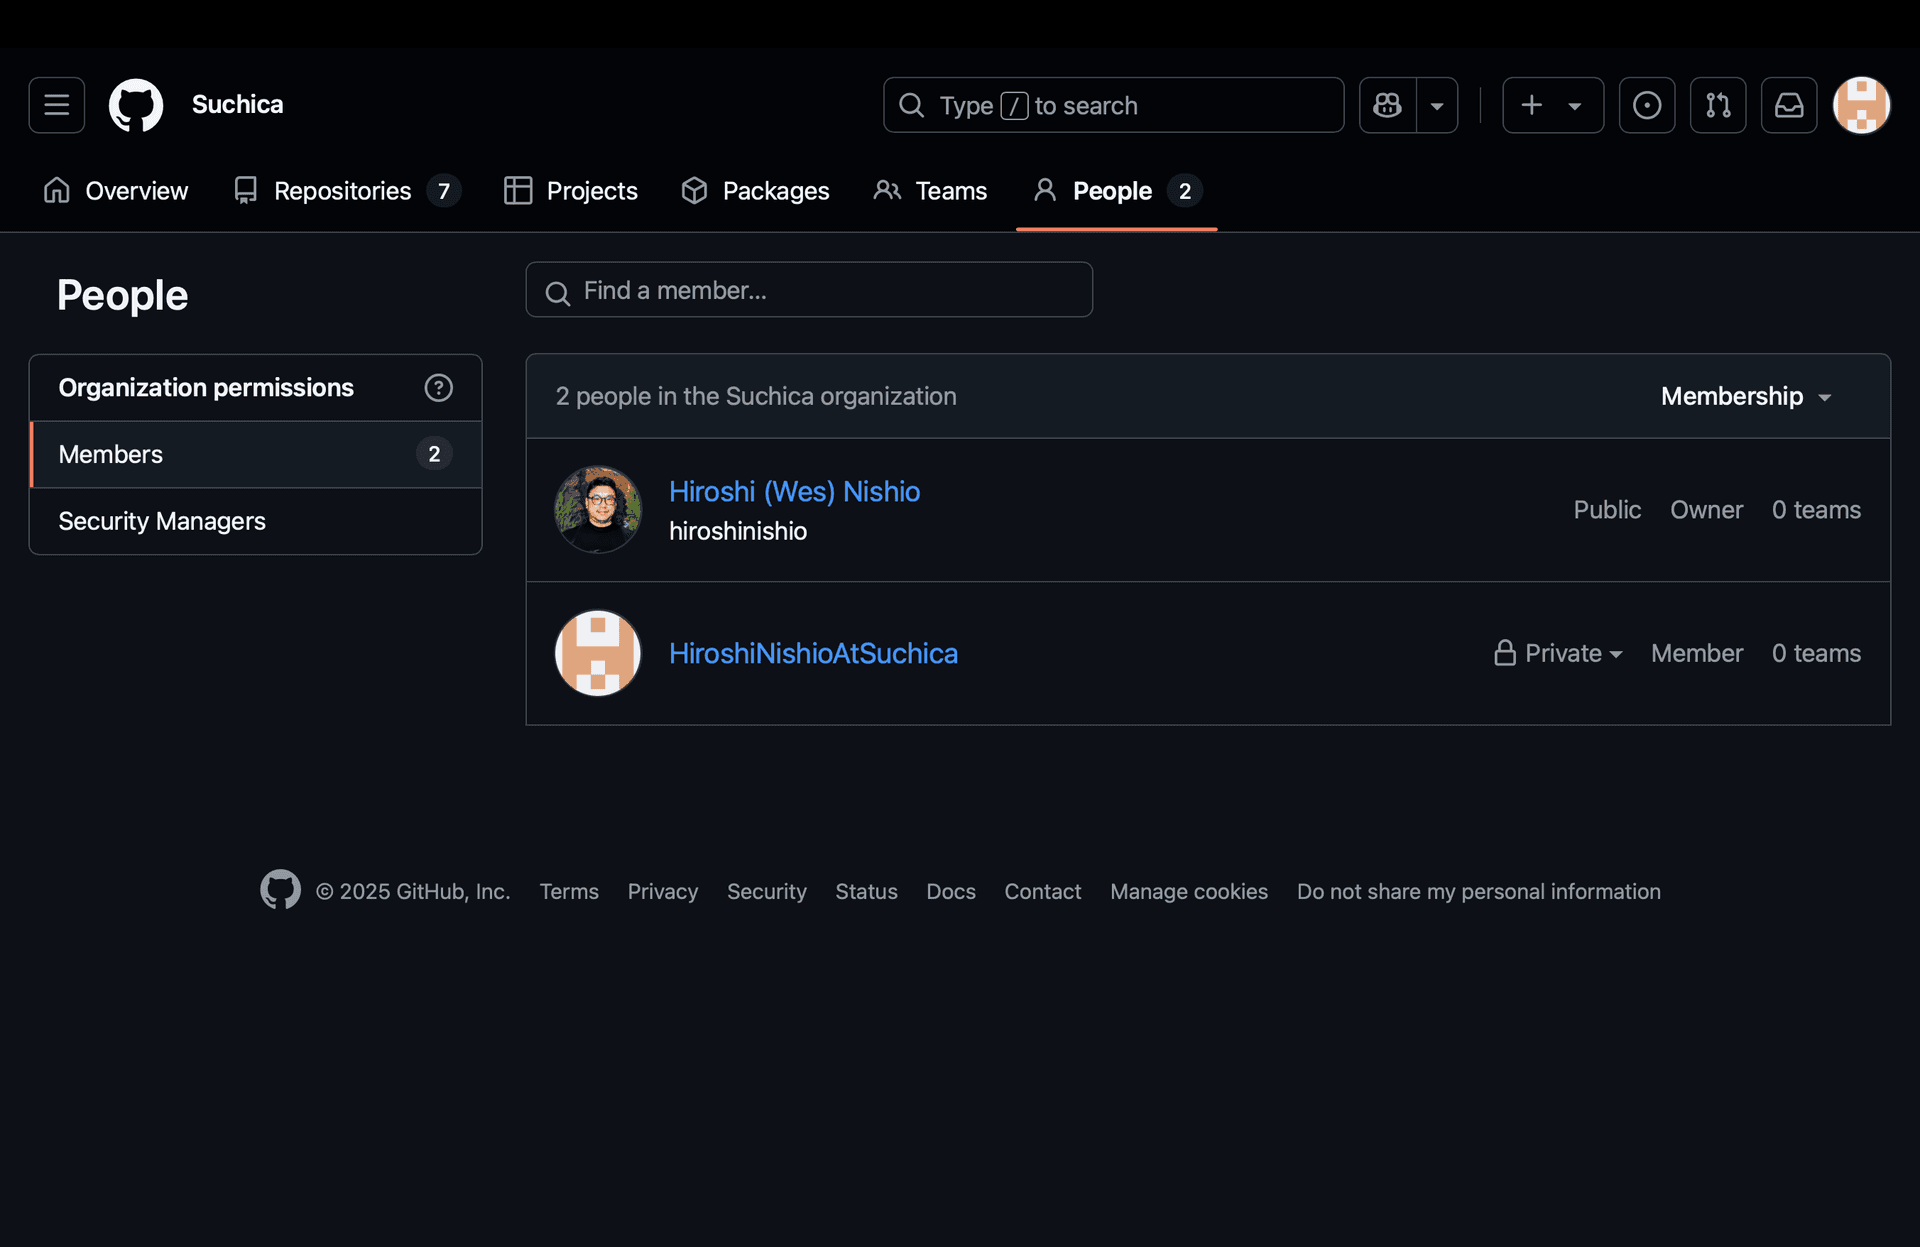
You can check who has admin permissions in your organization by:
- Going to your organization's page
- Clicking "People" in the top navigation
- Looking for members with the "Owner" role - these are your administrators
No notifications will be sent to others about this installation, so if you want someone to know, you'll have to tell them directly.
5. Post-Installation
After installation, GitAuto will start interacting with new issues by commenting on them. Or label an issue with "gitauto" for existing issues for GitAuto to interact with and open a PR.
You can also access the previous configuration screen directly after installation through:
https://github.com/organizations/[YOUR-ORG-NAME]/settings/installations(replace [YOUR-ORG-NAME] with your organization name)- Or navigate through: Organization page > Settings > GitHub Apps
However, if you're unsure about your organization name or the exact URL, it's easier to start from step 1 using the installation page.
6. Issue Template PR
GitAuto will also create a pull request to merge its issue template YAML files into your each repository where GitAuto is installed. If you want to use GitAuto's issue templates, especially if you're unsure how to structure issues, go ahead and merge those pull requests. Otherwise, you can ignore and close those pull requests.
And that's it! You're now set up to leverage GitAuto's capabilities in your GitHub repositories. Happy coding!